Understanding Cone Firing Temperatures for Ceramics
In ceramics, the term “cone” refers to a standardized measurement of heat work, which combines both temperature and time during the firing process. This system, developed over a century ago, allows potters to predict and control the maturity of clay bodies and glazes. Understanding cone numbers is essential for achieving consistent results, whether you are firing functional ware or sculptural pieces. This article explores the concept of cone firing temperatures, how they are determined, and how to select the appropriate cone for your specific clay body and desired finish.
The cone system is based on small, pyramid-shaped indicators made from carefully formulated ceramic materials. These cones, known as Orton cones, are placed in the kiln and observed through a peephole during firing. As the kiln reaches a certain temperature and holds it for a specific duration, the cones soften and bend, indicating that a particular heat work level has been achieved. This method is more accurate than a simple temperature reading because it accounts for the cumulative effect of heat over time, which is crucial for vitrification and glaze development.
Choosing the right cone is a decision that impacts every stage of the ceramic process, from clay preparation to final firing. Different clay bodies and glazes are formulated to mature at specific cone ranges. For instance, earthenware typically fires at lower cones, while stoneware and porcelain require higher temperatures. Additionally, the desired finish, such as a glossy glaze or a matte texture, may influence your cone selection. This guide will walk you through the cone system, the factors to consider when choosing a cone, and practical steps for testing and adjusting your firing schedules.
The Cone Scale and Heat Work
The cone scale is divided into ranges that span from very low temperatures to extremely high ones. The numbers are arranged with a slash (e.g., Cone 04) to indicate temperatures below 1000°C, while higher numbers (e.g., Cone 6) are written without a slash. This can be confusing at first, but it is a historical convention. The table below outlines the approximate temperatures for common cones, but it is important to remember that these are not fixed points. The actual temperature required to bend a cone depends on the rate of temperature increase. A slower firing rate will cause a cone to bend at a slightly lower temperature, while a faster rate will require a higher temperature to achieve the same effect.
Heat work is a concept that describes the total effect of temperature over time. For example, firing a piece to 1200°C and holding it for 30 minutes will produce a different result than firing it to the same temperature and immediately turning off the kiln. The cone system inherently measures heat work, which makes it a reliable tool for ensuring consistent results across different kilns and firing schedules. Clay bodies and glazes are formulated with a specific cone in mind, and deviating from that cone can lead to under- or over-firing, which may cause defects such as pinholing, crazing, or lack of vitrification.
Understanding the relationship between cone numbers and heat work is fundamental for any ceramicist. By learning to interpret cone charts and adjusting your firing schedules accordingly, you can achieve the desired outcome for your pieces. It is also essential to note that cones are available in different sizes and temperature accuracy grades, and they should be placed in the kiln in a way that allows for proper observation. Typically, a set of cones is placed in a kiln sitter or in a cone pack, with a self-supporting cone designed to bend at the desired temperature.
Factors Influencing Cone Selection
Selecting the appropriate cone for your project involves considering several key factors. First, the type of clay body you are using is critical. Clay bodies are classified as earthenware, stoneware, or porcelain, each with a recommended cone range. Earthenware, for instance, is often fired between Cone 04 and Cone 06, which corresponds to temperatures around 1000-1100°C. Stoneware is typically fired between Cone 6 and Cone 10, while porcelain often matures at Cone 8 to Cone 12. Using a clay body outside its recommended range can cause it to become brittle, warp, or bloat. It is important to check the manufacturer”s specifications or test your clay to determine its optimal maturity.
The desired finish of your piece also plays a role in cone selection. Glazes are formulated to melt and interact with the clay body at specific temperatures. Some glazes are designed for low-fire applications, while others require high temperatures to develop their full color and texture. For example, a glossy, brightly colored glaze may be intended for Cone 06, while a matte, earthy glaze might require Cone 6 or higher. Choosing a cone that matches your glaze”s requirements will help ensure that the glaze melts properly and adheres to the clay. Additionally, the atmosphere inside the kiln, whether oxidizing or reducing, interacts with both clay and glaze at elevated temperatures, further influencing the outcome.
Another consideration is the firing cycle or schedule you plan to use. As mentioned, the rate of temperature increase affects heat work. Slow firings, such as those used in raku or crystal glazes, may require adjusting the cone number downward to compensate for the extended soaking time. Fast firings, on the other hand, may require a higher cone to achieve the same maturity. Kiln shapes and heating elements also affect temperature distribution, so it is advisable to map out your kiln”s hot spots and place cones accordingly. Finally, the size and thickness of your pieces influence heat retention; larger, thicker pieces may need a longer hold to ensure even heat work throughout the body. By taking these factors into account, you can make an informed choice.
Common Cone Ranges and Their Uses
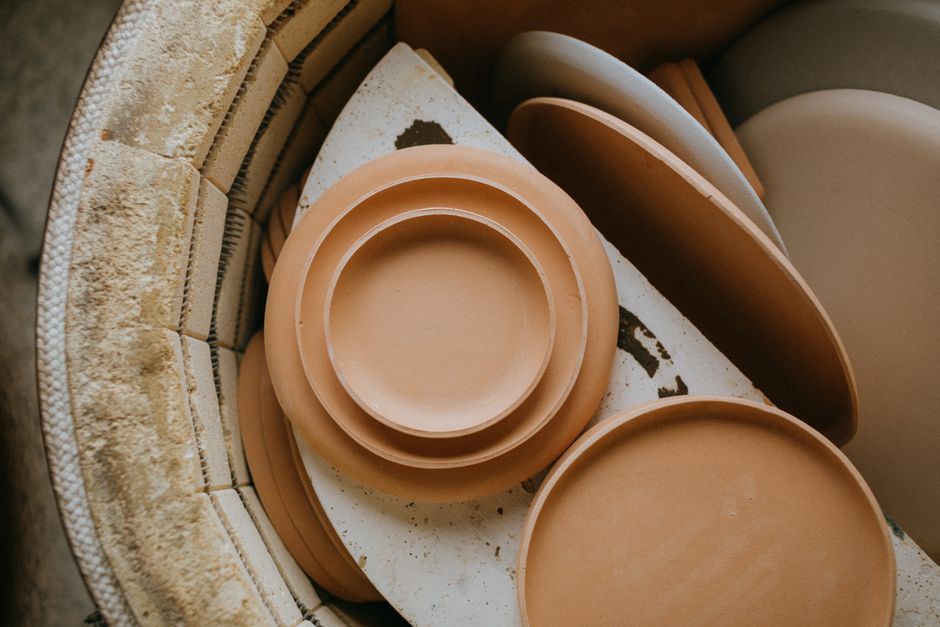
The cone system is divided into several ranges, each with characteristic applications. The low-fire range, typically from Cone 022 to Cone 04, is commonly used for earthenware, terra cotta, and some decorative pieces. These firings occur between 600°C and 1100°C. Low-fire clays are porous and require a glaze to make them waterproof. They are often used for flower pots, decorative tiles, and sculptural work. Glazes for this range are available in vibrant colors and are relatively easy to apply, making them popular for beginners and hobbyists.
The mid-fire range, roughly Cone 4 to Cone 7, is a versatile choice for many ceramicists. Firing temperatures range from 1150°C to 1260°C. Stoneware clays that are vitrified to a point of low porosity are common in this range. Many potters choose mid-fire for its balance of workability and durability. Glazes formulated for this range often produce rich satin or semi-gloss finishes and are less prone to defects compared to low-fire glazes. This range is suitable for functional ware, dinnerware, and art pieces.
The high-fire range, from Cone 8 to Cone 12, is used for porcelain and stoneware that requires a high degree of vitrification. Firing temperatures reach up to 1350°C or higher. High-fire ceramics are dense, strong, and highly durable, making them ideal for fine dining ware and architectural ceramics. Glazes at these temperatures can develop subtle, crystalline surfaces and often require a reducing atmosphere to achieve their characteristic colors. Because of the high temperatures, these firings are energy-intensive and require skilled kiln operation.
It is also worth noting that some ceramicists use a two-step firing process, such as a bisque firing at a lower cone and a glaze firing at a higher cone. Bisque firings, often around Cone 04 to Cone 06, are used to harden the clay before glazing, making it easier to handle and less porous. The glaze firing, then, is tailored to the glaze and clay combination. By understanding the properties of each cone range, you can adapt your technique to achieve the desired results.
How to Determine Your Ideal Cone
Determining the ideal cone for your ceramic work involves a systematic approach. Start by consulting the specifications provided by your clay and glaze suppliers. Most manufacturers list recommended cone ranges for their products. For example, a clay body labeled “cone 6 stoneware” is formulated to mature at that cone. Similarly, glaze packaging often indicates the target cone. These recommendations are based on tests and are a reliable starting point. However, real-world conditions can vary, so it is wise to conduct your own tests.
Test tiles are an invaluable tool for cone selection. Create several small tiles from your chosen clay and apply the glazes you plan to use. Fire these tiles in separate kiln loads at different cones, such as Cone 5, 6, and 7, to see what happens. Observe the results: Did the clay vitrify adequately? Did the glaze melt properly? Were there any defects? This empirical data will help you fine-tune your firing schedule. Additionally, you can log your firing schedules and outcomes in a notebook to build a reference over time.
Another method is to use a kiln controller with built-in cone programs. Many modern kilns have digital controllers that automatically adjust firing schedules to reach a specified cone. These controllers use thermocouples and advanced algorithms to simulate the heat work of a cone. While they are convenient, it is still recommended to use physical cones as a backup to verify that the firing achieved the intended result. Placing a cone in front of a peephole allows you to visually confirm the bend and adjust future firings if necessary.
When experimenting, remember that the heat work, not just the peak temperature, is crucial. A slower firing with a longer soak may allow a lower peak temperature to achieve the same result as a fast firing to a higher temperature. For example, a cone 6 firing with a 15-minute hold at peak temperature might be equivalent to a cone 7 firing with no hold. Understanding this interplay can give you more flexibility in your firing schedule, potentially saving energy and time while achieving the desired outcome.
Practical Tips for Cone Firing
To get the most reliable results from cone firing, pay attention to the placement and setup of cones in your kiln. Cones should be placed in areas that represent the average temperature and heat work within the kiln, typically near the center and at the shelf level. Avoid placing them too close to heating elements, thermocouples, or drafts, as these can skew readings. Use a cone pack, which consists of a small slab of clay with three or more cones of different temperatures, to track the firing. Observing the bending of these cones through the peephole allows you to monitor the process and make adjustments if needed.
The rate of temperature increase, or firing speed, is another factor that influences heat work. A typical firing might ramp up at 100-150°C per hour, but the final segment near the target temperature is often slowed down to allow the heat to penetrate the clay and glaze. The Orton cone charts provide suggested firing schedules for each cone, including ramp rates and soak times. Following these guidelines can help you achieve consistent results. However, every kiln is different, so it is important to calibrate your kiln by firing test cones and comparing the results.
When loading the kiln, ensure adequate spacing between pieces to allow air circulation and even heat distribution. Overloading can cause uneven firing and hot spots. Using kiln furniture, such as shelves and posts, helps create a stable and uniform environment. Also, consider the type of clay you are firing: some clays emit gases during firing, so make sure to have adequate ventilation to prevent carbon buildup or bloating. By following these practical tips, you can maximize the accuracy of your cone firings and produce high-quality ceramics.
The Role of Testing and Adjusting
Testing is an ongoing process in ceramics. Even after you establish a reliable cone for your standard pieces, it is wise to conduct periodic tests, especially when you change clay bodies, glazes, or kiln settings. Small variations in raw materials can affect how a clay matures, and glazes may behave differently with different clay bodies. By maintaining a regular testing schedule, you can catch issues early and make necessary adjustments to your firing approach.
When you encounter problems, such as underfired clay or glaze defects, the cause may be related to heat work. Underfiring can lead to a porous body that absorbs liquid, while overfiring can cause warping or bloating. If this happens, review your records and consider adjusting your cone target. For example, if your stoneware is underfired at Cone 6, try firing at Cone 7 and observe the difference. Similarly, if you experience pinholes in your glaze, it might be due to too-fast firing or a need for a longer soak. Keep a detailed log of your firings and the resulting outcomes, as this data will guide your decisions.
Collaborating with other ceramicists and participating in online forums can also provide insight into cone selection for specific techniques or materials. Sharing your experiences and learning from others can help you solve challenges more quickly. Remember that the cone system is a tool to help you understand and control the firing process. It does not guarantee a specific result, but it provides a framework for reproducibility. By combining this knowledge with your creativity and experimentation, you can develop a firing regimen that produces the exact qualities you seek in your ceramic work.
The cone system is a valuable tool for communicating and controlling heat work in ceramics. By understanding its principles and applying them through testing, you can achieve consistent and desirable results in your pottery.